 Skewered Fencing
Overview
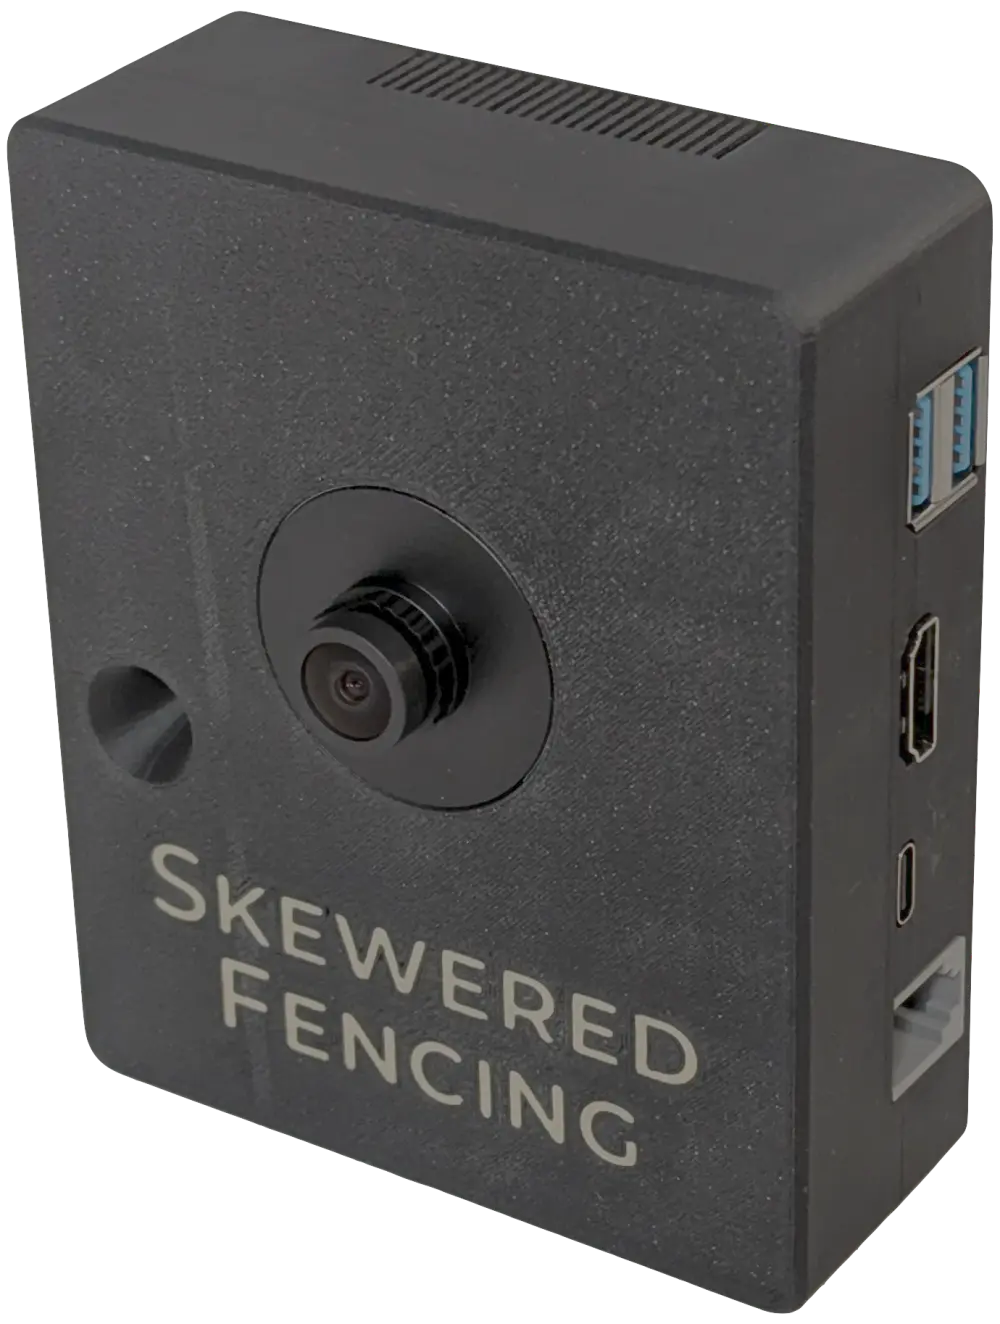
The Skewered Fencing Video Replay System (VRS) is a small camera unit that plugs into a Skewered Fencing scoring box. It continuously buffers high-speed, high-resolution video and, every time a touch is scored, keeps the moments before and after the touch so they can be reviewed in slow motion. It also records entire bouts.
There are three ways to interact with it, from simplest to most capable:
- A local display connected directly to the system, controlled entirely from the scoring box remote.
- The Skewered Fencing mobile app, which finds nearby systems automatically and provides their full functionality.
- A web interface served by the system itself, for use from any browser on the same network.
This manual covers each of these in turn, followed by the system's ports and connectivity, the camera lens, and software updates.
Local Display
The simplest way to use the system is to connect a display and the scoring box and review replays with the scoring box remote. No network, app, or computer is needed.
Setup
- Connect an HDMI display to the HDMI port of the VRS.
- Connect the scoring box to the RJ14 (telephone) jack of the VRS with a telephone cord. Long cords (100 feet or more) are supported. Make sure to use the telephone jack, which is on the same side as the HDMI port, and not the similar-looking ethernet jack on the other side of the unit.
- Connect USB-C power to the VRS. With the included power supply, use its USB-C2 outlet for the VRS; USB-C1 is for the display (see Power supply). If you use the included dongle with your own USB-C power brick instead, the brick must be capable of at least 25 W (see Power).
The system turns on as soon as power is connected. While it starts up, the display shows live video from the camera for about 30 seconds so you can aim the camera at the strip and check its focus (see Camera Lens). After that, the display switches to the repeater view.
Usage
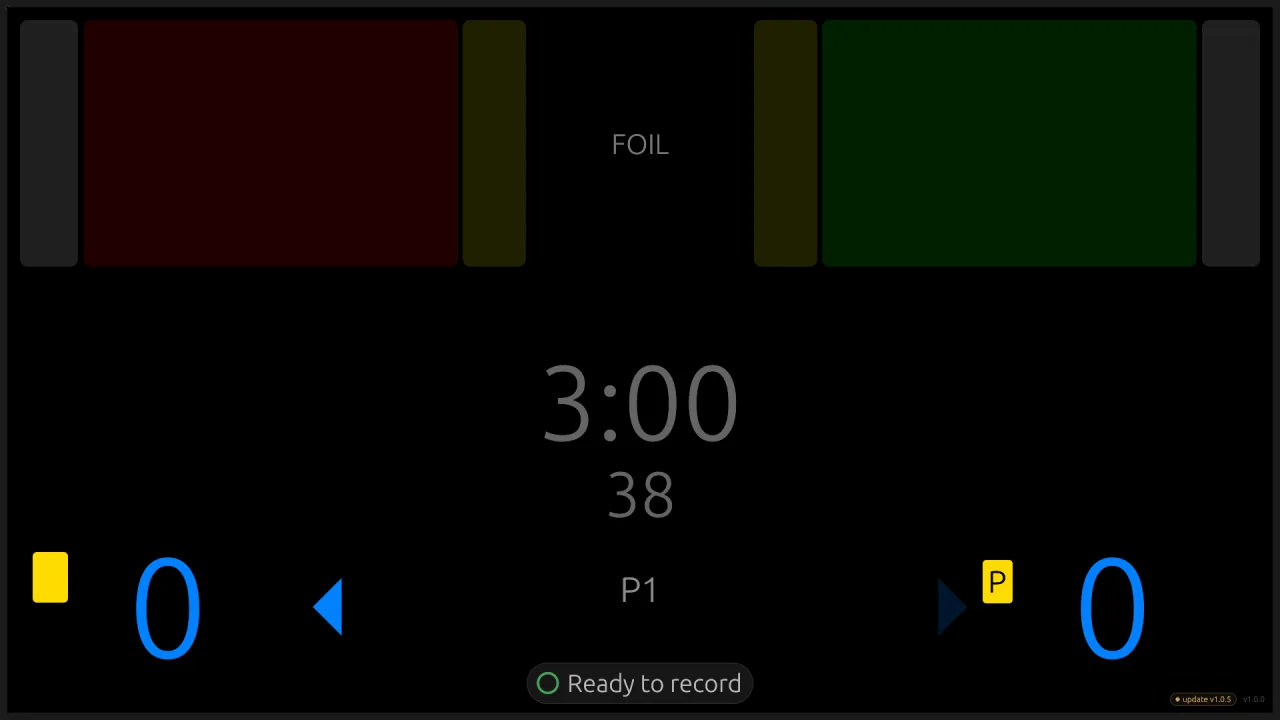
While connected to a scoring box, the display acts as a repeater: it mirrors the lights, score, clock, cards, period, and passivity timer of the scoring box.
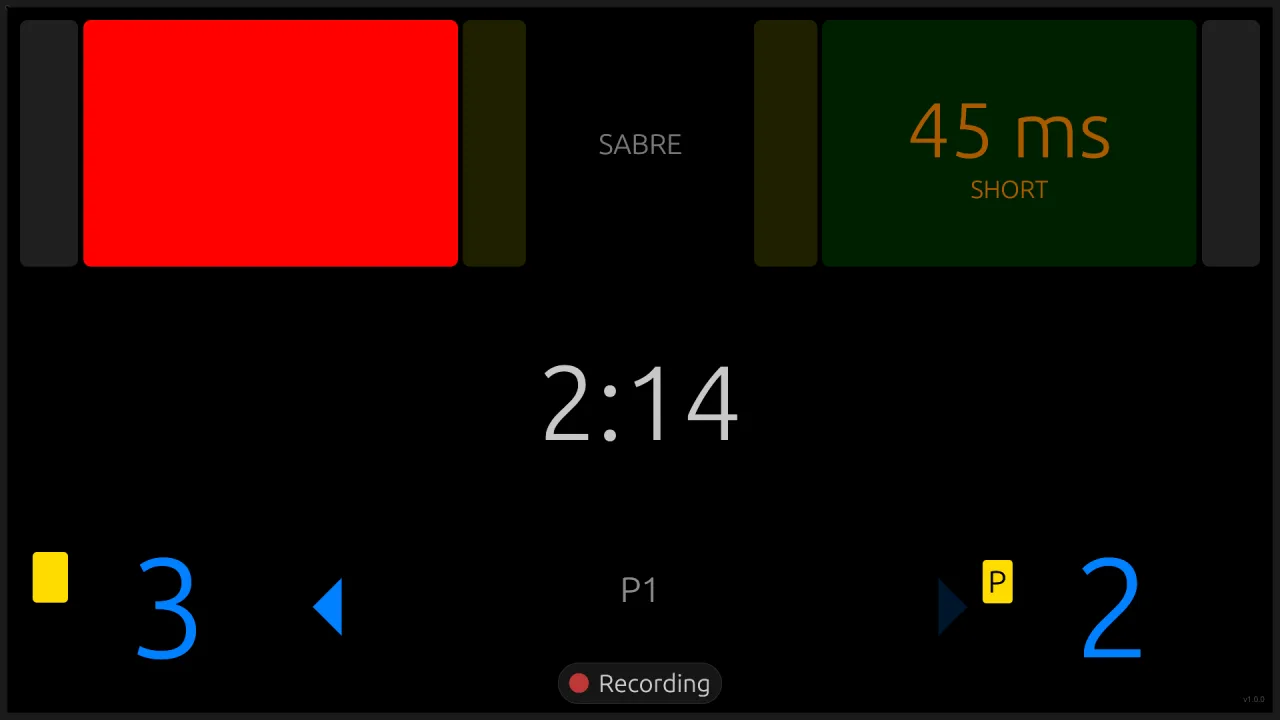
A small status indicator at the bottom of the screen shows what the system is doing:

- Ready to record: The camera is running and touches will be captured. A bout recording starts as soon as the clock starts or a touch occurs.
- Recording: A bout is being recorded.
- Camera inactive: The camera is off, for example while a recorded bout is being played back on the display.
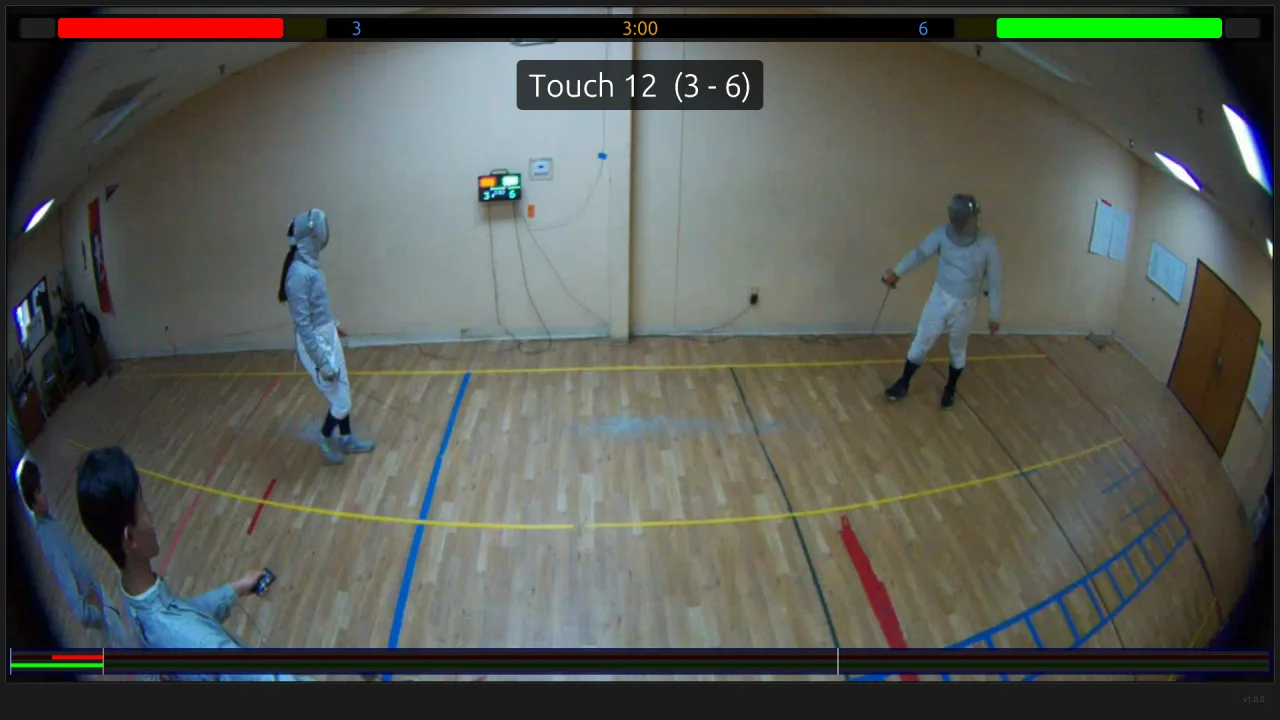
When any touch occurs, the VRS automatically stores a high-speed capture of the video from before and after the touch. To view the replay:
- Press the white ↩ button on the remote to bring up the timeline of the last touch on the scoring box. While the timeline is being reviewed, the display replays that touch in a loop, initially at normal speed.
- Each further press of ↩ scrolls the timeline to the left and slows the replay down. Each press of ↪ scrolls the timeline back to the right and speeds the replay back up. Once the replay is back at normal speed, one more press of ↪ dismisses the timeline.
- Long-press the FUNC button to go back to the previous touch of the bout. Each long-press steps back one more touch. The replay is labeled with the touch number and the score after that touch.
- Press CLR at any time the timeline is visible to dismiss it. This ends the review and returns the display to the repeater view.
For example, a complete review of the last touch looks like this:
| Press | Result |
|---|---|
| ↩ | Show the timeline and replay the last touch at 1× speed |
| ↩ | Scroll the timeline left and slow the replay to 0.5× |
| ↩ | Scroll the timeline left again and slow the replay to 0.25× |
| ↪ | Scroll the timeline back right and speed the replay up to 0.5× |
| ↪ | Scroll the timeline back right again and speed the replay up to 1× |
| ↪ | Dismiss the timeline |
| CLR | Dismiss the timeline at any point |
Point the remote at the scoring box, not at the VRS. The video replay system has no infrared receiver and cannot see the remote. It follows the scoring box over the telephone cord, so everything the box does, including reviewing the timeline, is reflected on the display.
When the scoring box goes to sleep, the display is turned off as well. It turns back on as soon as the box wakes up.
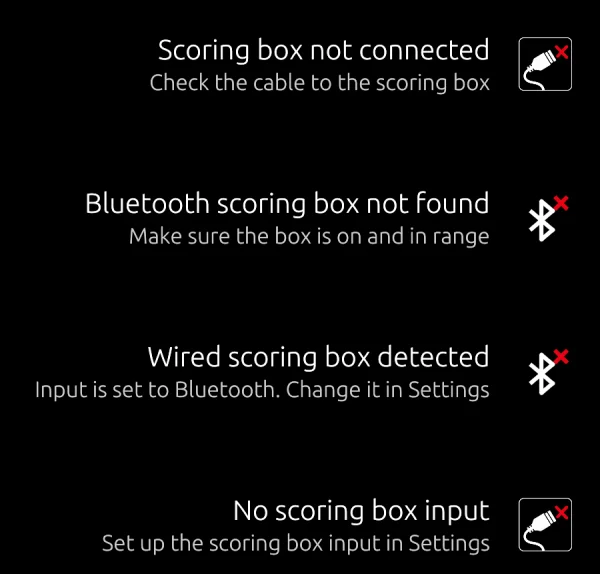
If the system cannot see a scoring box, it says so with a badge in the corner of the display. "Scoring box not connected" means the telephone cord between the box and the VRS should be checked.
Mobile App
The Skewered Fencing mobile app provides the full functionality of the system: reviewing touches and entire bouts, watching the live camera, controlling the display, and configuring the system.


Finding a system
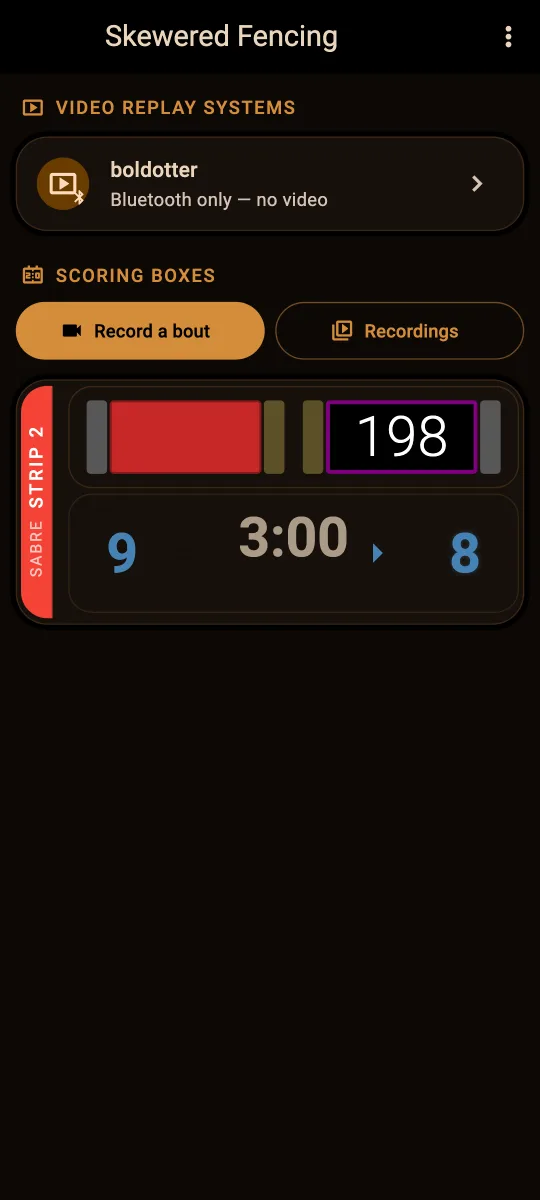
The app automatically detects nearby video replay systems and lists them under "Video Replay Systems" on its home screen. Systems are found in two ways:
- Over a short-range wireless link, whenever the phone is within range. This direct connection is enough to configure the system and control its display, but it cannot carry video, bouts, or software updates. Such systems are listed as available over a direct link only.
- Over the network, when the phone is on the same network as the system. This unlocks everything: touches, bouts, live video, and updates.
Getting on the same network
Each video replay system broadcasts its own WiFi hotspot named SKVRS-name, where name is the system's name as shown in the app, unless it has been configured to connect to a WiFi network. The default hotspot password is skewered. There are two ways to get the phone and the system on the same network:
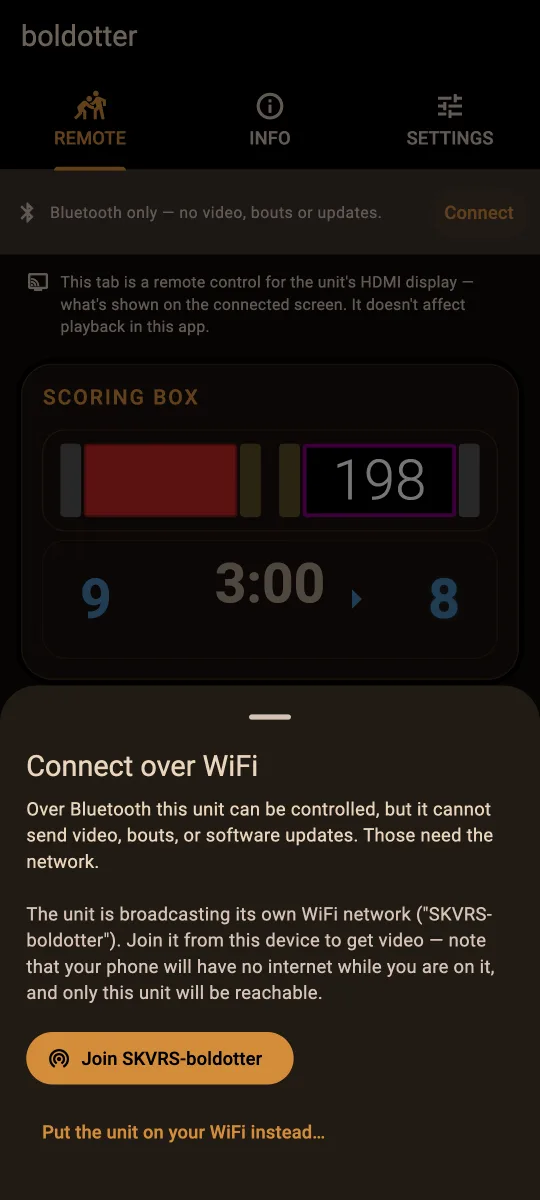
- Join the system's hotspot. Tap the system in the app and choose Connect; the app offers to join the hotspot for you. This works anywhere, with no venue WiFi at all, but your phone has no internet access while it is on the hotspot.
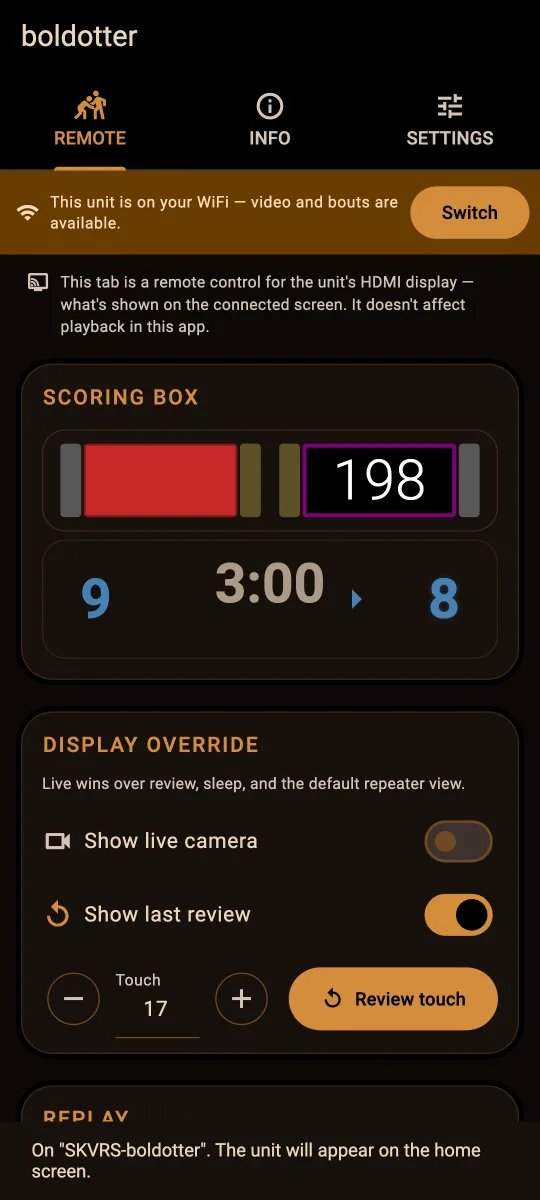
- Put the system on your WiFi (recommended). From the same Connect dialog choose Put the unit on your WiFi instead, pick a network, and enter its password. The credentials are sent over the direct wireless link, the system joins the network and stops its hotspot, and from then on it appears in the app whenever your phone is on that network. A system on a WiFi network with internet access also checks for software updates by itself.
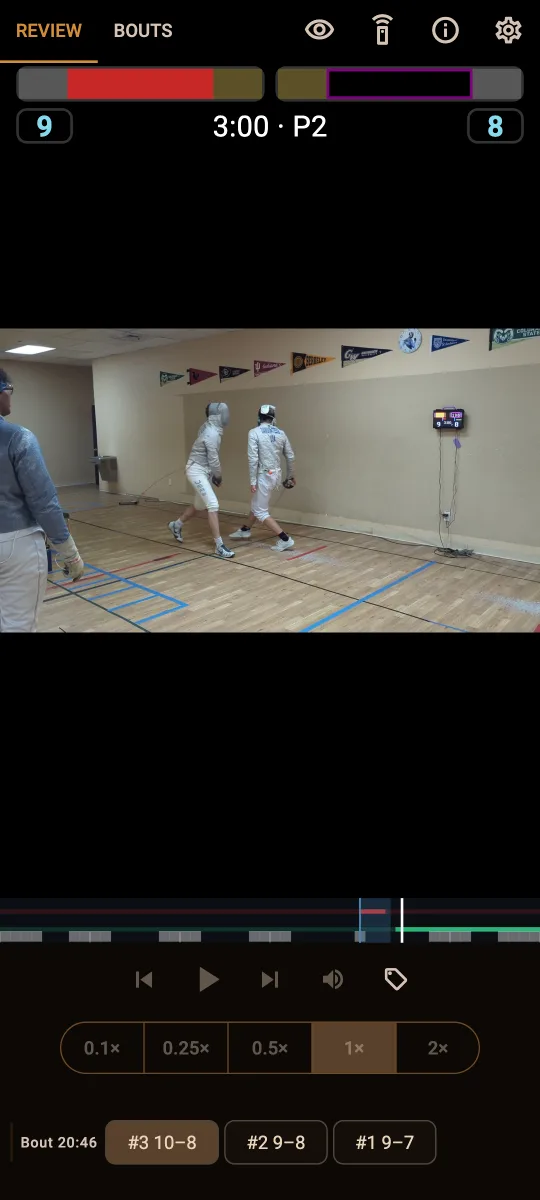
What you can do
- Review: Every touch of the current bout, with the scoring box lights, score, and clock overlaid on the video. Play at 0.1× to 2× speed, step frame by frame, and jump from touch to touch.
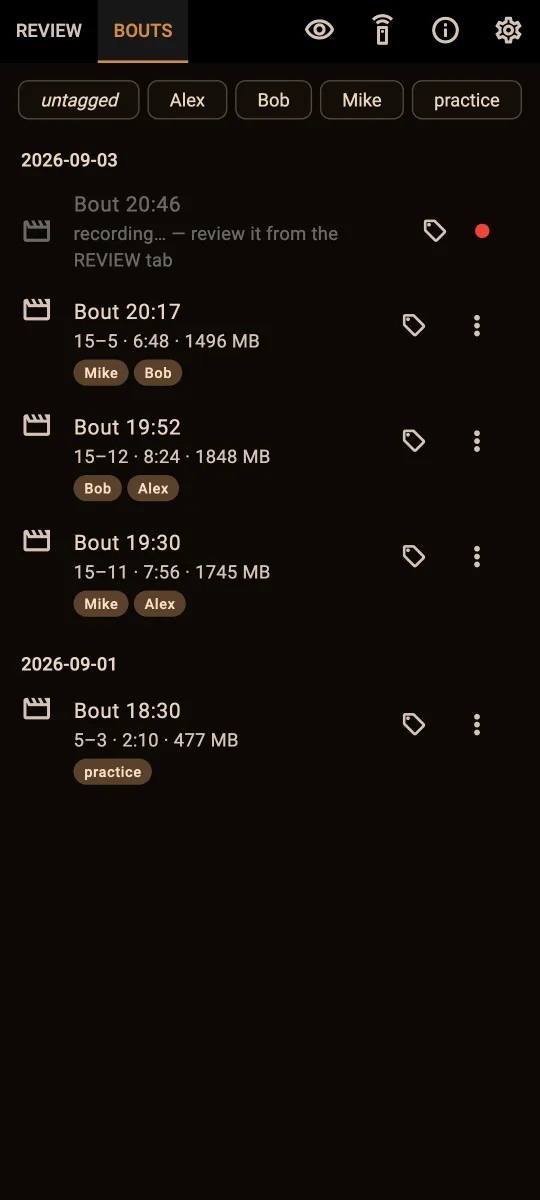
- Bouts: The recorded bouts, grouped by date with their score, duration, and size. Tap a bout to watch it in full and skip between its touches. Bouts can be named and tagged so they are easy to find later.
- Live: The live camera view, useful when aiming and focusing the camera.
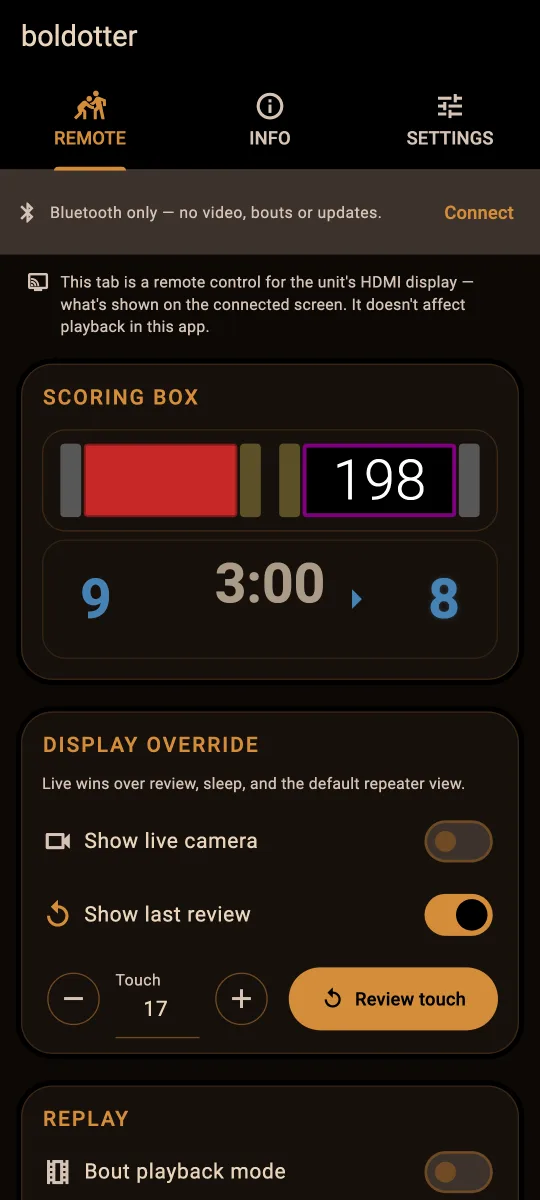
- Remote: Control what the HDMI display shows: force live video, show the last touch again, review a specific touch by number, or put the display into bout playback mode.
- Info: The system's name, network address, and software version.
- Settings: Configure the system, including its network connection and software updates.
The app automatically tries the default passwords described under Web Interface. If you have changed the admin password, the app asks for it and can remember it.
When bouts are recorded
The system starts recording a bout when a touch occurs or the clock is started. It stops the recording when the scores are cleared, when the scoring box goes to sleep, or when 5 minutes pass with no touches. Every touch of a recorded bout can be reviewed from the app or the web interface, and bouts are kept on the system until you delete them (or, optionally, until it runs low on space).
Web Interface
The system also serves a web interface that works from any browser on the same network: join the system's hotspot, or join the same WiFi or wired network that the system is on.
Address
- When connected to the system's hotspot, open http://192.168.4.1.
- On a shared network, open http://vrs-name.local, where name is the system's name as shown in the app (for example, http://vrs-boldotter.local). The exact address is also shown on the app's Info tab.
Login
The configuration pages are password protected. The default login is the user admin with the password skvrs. The password can be changed on the Settings page; the mobile app uses the same password.
Pages
- Viewer: Browse and watch entire recorded bouts, grouped by date and filterable by tag. The bout timeline marks every touch so you can jump straight to it, and a zoomed timeline appears around each touch. Bouts can be named, tagged, and annotated. Keyboard shortcuts and a fullscreen mode are listed in the Help section of the page.
- Live: The live camera view.
- Replay: Recent touches, with slow motion, pause, and frame stepping, and buttons to step to older or newer touches.
- Admin: The system's status page, WiFi configuration, software updates, and settings: storage limits, system name, scoring box input, display orientation, admin password, and restart.
Connectivity & Ports
Viewed from the front (the lens side), the right side of the unit has, from top to bottom:
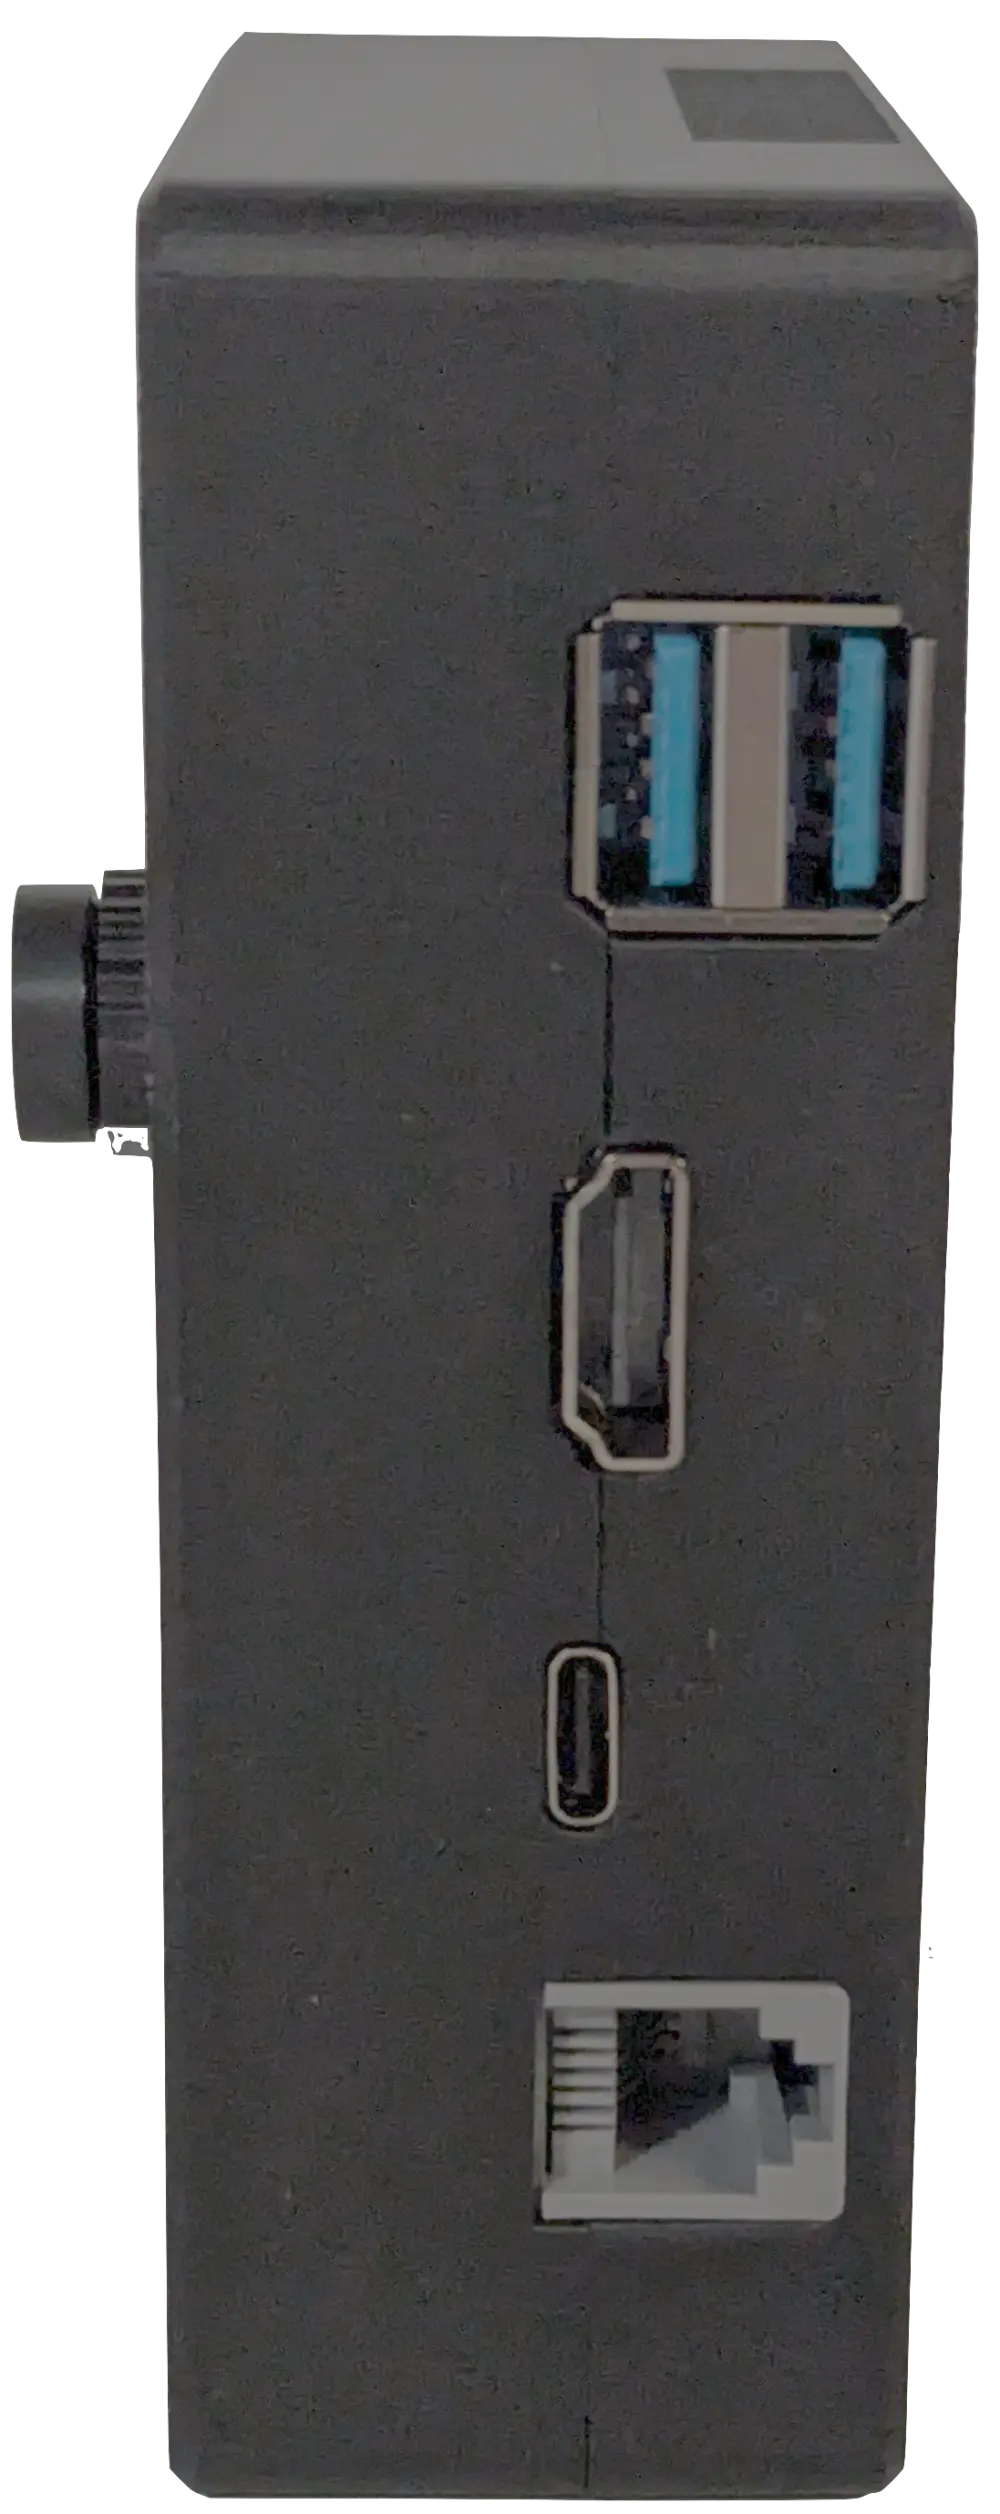
- Two USB ports. Plug in a USB drive containing a software update to update a system that has no WiFi access (see Software Updates).
- HDMI. For a local display.
- USB-C power input. The system requires 5.1 V at 4 A, which is an unusual requirement. The included power supply provides this from its USB-C2 outlet (see Power supply below). Alternatively, any USB-C power brick that provides 25 W or more can be used together with the included dongle, which requests the correct voltage from the brick.
- RJ14 telephone jack (serial). For the telephone cord to the scoring box.
The left side has, from top to bottom:
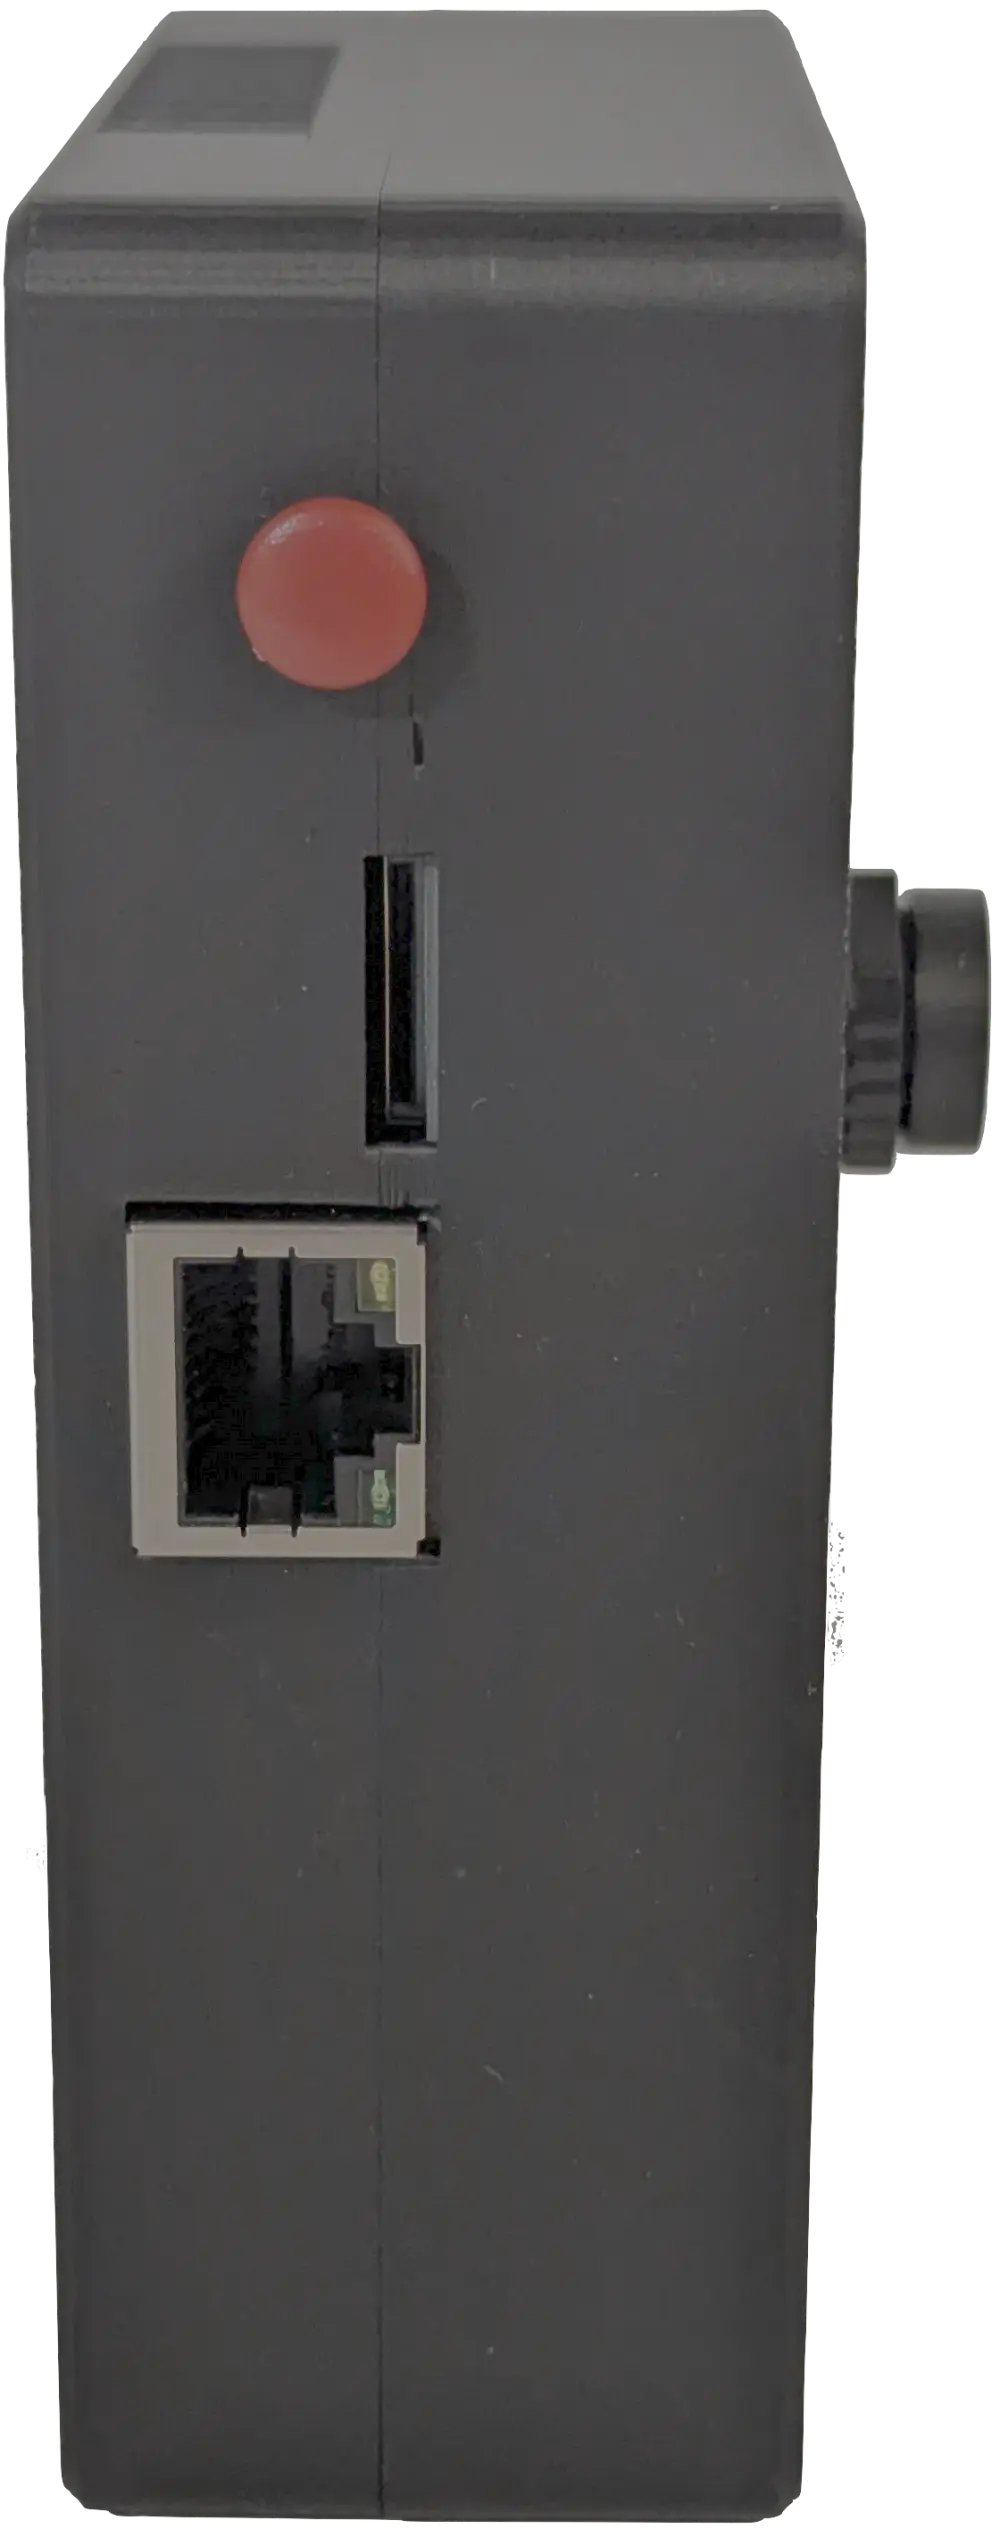
- Red power button. Press it to turn the unit off. The unit turns on by itself whenever power is connected, so there is normally no need to press it to turn on.
- Recessed SD card slot. Used only with recovery media to reinstall the system software in case of damage or corruption (recordings and settings are preserved). Contact us if you ever need this.
- RJ45 ethernet jack. For a wired network connection.
The telephone (serial) jack and the ethernet jack look similar but are NOT interchangeable. The telephone cord to the scoring box goes in the smaller jack on the right side, below the HDMI and USB-C ports.
The system also has WiFi (as a client or as its own hotspot) and a short-range wireless link for direct connections.
Power supply
The included power supply has two USB-C outlets. Use USB-C1 for the display and USB-C2 for the video replay system.
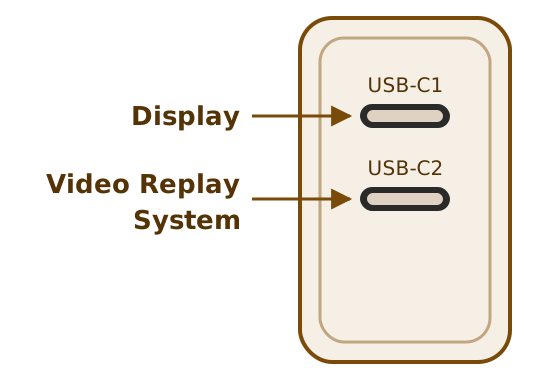
Do not switch the two. Plugging the video replay system into USB-C1 may prevent it from booting up due to insufficient power.
Camera Lens
The camera accepts any M12 lens. The included lens is a 2.1 mm wide-angle fisheye that fits the entire strip into view from only a few meters away. If you have more room and want a less distorted view of the strip, or if you want to mount the system on a swivel that can follow the fencers, you can easily swap in a lens with a different focal length: simply unscrew the included lens and screw in your own.
The lens is focused by screwing it in or out. To check the focus, use the live view: it is shown for about 30 seconds after power-on, and it is also available at any time from the app (the Live view, or Show live camera on the Remote tab) and from the web interface (Live). To prevent the lens from moving once it has been focused, use one of the provided lens lock rings and tighten it once the lens is in focus.
Software Updates
We highly recommend using the mobile app to connect the system to a WiFi network with internet access. The system then checks for updates by itself once a day. When an update is available, a small badge appears in the bottom-right corner of the display, and the update is offered in the app and in the web interface. Nothing is installed until you choose to install it.
To install an update, open the system's Settings in the app (or the Admin Updates page in the web interface) and choose Install. The system restarts onto the new version within a few seconds. Do not install during a bout: the restart interrupts the recording.
If the system cannot be given internet access, there are two alternatives:
- Through the app. The app can check for and download updates while the phone has internet access, keep them on the phone, and later send them to a system over its hotspot or a shared network.
- By USB drive. Copy the update file onto a USB drive, plug the drive into one of the USB ports, then open the Updates page in the app or the web interface, check the USB drive, and install.
Every update is cryptographically signed, and the system verifies the signature before installing anything.